How to measure and install your windscreen
A Step-by-Step Guide to Mastering Windscreens
Install
Preparation
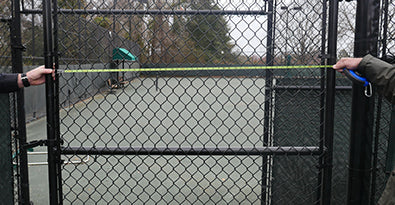
- Position the screen before you install
To make installation easier, don’t wrestle with your material. A large screen can be heavy. Spread out your panel along the court and gauge your placement before securing it to the fence. Center the screen on its fence segment.
Pro tip
Temporary placement before tying down
Use “S” hooks to temporarily hang the screen on the fence. By lifting the segment, it decreases the weight and makes it easier to attach and tighten the Ty-Rap® at the grommets. S-hooks will hold everything up while you adjust the screen’s placement. Pull the screen taut with each grommet attachment for smooth placement of the screen.
- Decide what height to hang it from
9' windscreens are usually hung from the top of the chain-link fence. A typical fence height is 10', which allows for 1 foot of air space at the bottom. 6' windscreens, if used on a 10’ fence, are placed in the center of the chain-link fence or 2' from the top.
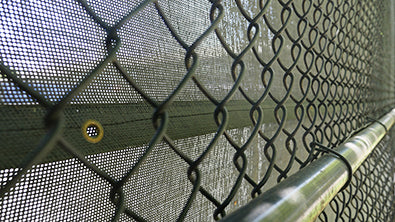
- Hide the seams
Hang the windscreens so that the seams and hems face the fence and not the court. Leave the smooth side facing the court.
- Double check your labels
Compare the windscreen segment labels (generated at the manufacturer) to the labels on your court diagram so that each segment is installed in its correct position along the fence.
Fastening
- Use every grommet
ALL GROMMETS MUST BE USED to secure the windscreen to the fence. Attach every grommet. Do not skip any grommets. Attaching all the grommets distributes the force of high winds. Using fewer grommets results in more load on the grommets that are attached and increases the chances that ties will break. A windscreen can be damaged quickly if it breaks loose and thrashes against the fence.
- Start with the left edge
Start by fastening the left vertical edge along the tension bar at the desired height. Go from top to bottom, pulling taut as each tie is secured. Use regular (50-lb breaking strength) Ty-Rap®.

- Secure a portion of the top
Fasten the top of the windscreen to the fence, keeping the top straight by following the chain-link pattern. Pull taut at each grommet. Secure about 10’ of the segment. Use either regular Ty-Rap® or, if the windscreen will be rolled up to the top during high winds, snap hooks or heavy duty 120-lb breaking strength Ty-Rap®.
- Secure a portion of the bottom
After attaching about 10’ of screen at the top, begin to attach that section at the bottom. Again, pull taut at each grommet to make the screen as wrinkle-free as possible. Use regular Ty-Rap® or, if the windscreen will be rolled down to the bottom during high winds, use snap hooks or heavy-duty 120-lb breaking strength Ty-Rap®.
- Continue securing the rest of the segment
After the first 10’ of screen is attached at top and bottom, begin a new 10’ section, attaching at the top first, then the bottom, and pulling taut throughout. Continue attaching until you reach the end of the segment.
Pro tip
Attaching Ty-Rap
Attach the Ty-Rap® to the fence in the direction the segment is being pulled. As the Ty-Rap® is tightened, it will pull the cover taut. Don’t over tighten as this might result in wrinkling and insufficient room to straighten out the segment. After the segment is completely attached, ties can be further tightened, if necessary, to reduce any remaining wrinkles.
- Attach the right edge
At the end of the segment, attach the right vertical edge along the tension bar, or next to a line post if more than one segment is needed to cover a long fence. Use regular Ty-Rap®.
- Inspect and continue
You should now have one completely attached segment that fully covers a section of fence with a smooth, neat, professional appearance. Continue installing any remaining segments using the same method until the entire fence line is covered.
Pro tip
Installing with two people
If two or more people are installing the segment, have one person attach the screen at the top and the second person at the bottom. Have the second person work about 10’ behind the first so that each section installed is pulled taut and wrinkle free.
Anti-Billowing Center Tape
Center tape is used to secure the middle section of a 9’ or higher segment. It’s used to prevent billowing and keep the windscreen securely in place.
When anti-billowing center tape is used, the order in which you fasten the screen may change. Follow the general procedures outlined above, with one of the following variations:
- Top, bottom, middle. After the top and bottom of a section are attached, attach the center tape using regular, 50-lb breaking strength Ty-Rap® through each grommet.
- Middle, bottom, top. Place your anti-billow seam in the middle of the desired height. Then secure the bottom grommets, and then secure the top.
- Top, middle, bottom. Secure the top as described above. Next secure the middle seam, and then the bottom.
As always, pull taut along the way to prevent wrinkles.
Pro tip
Install on a calm day
Don’t install your screens on a windy day. Wind complicates installation and makes it more difficult.